하려는 것
iOS에서는 앱 아이콘을 길게 누르면 앱 내에서 자주 쓰는 동작들을 바로 실행할 수 있는 기능이 있습니다. 아래 사진은 토스의 Context Menu인데요, 토스에서 가장 자주 쓰는 기능인 소비, 송금, 주식, 만보기 등이 있습니다.
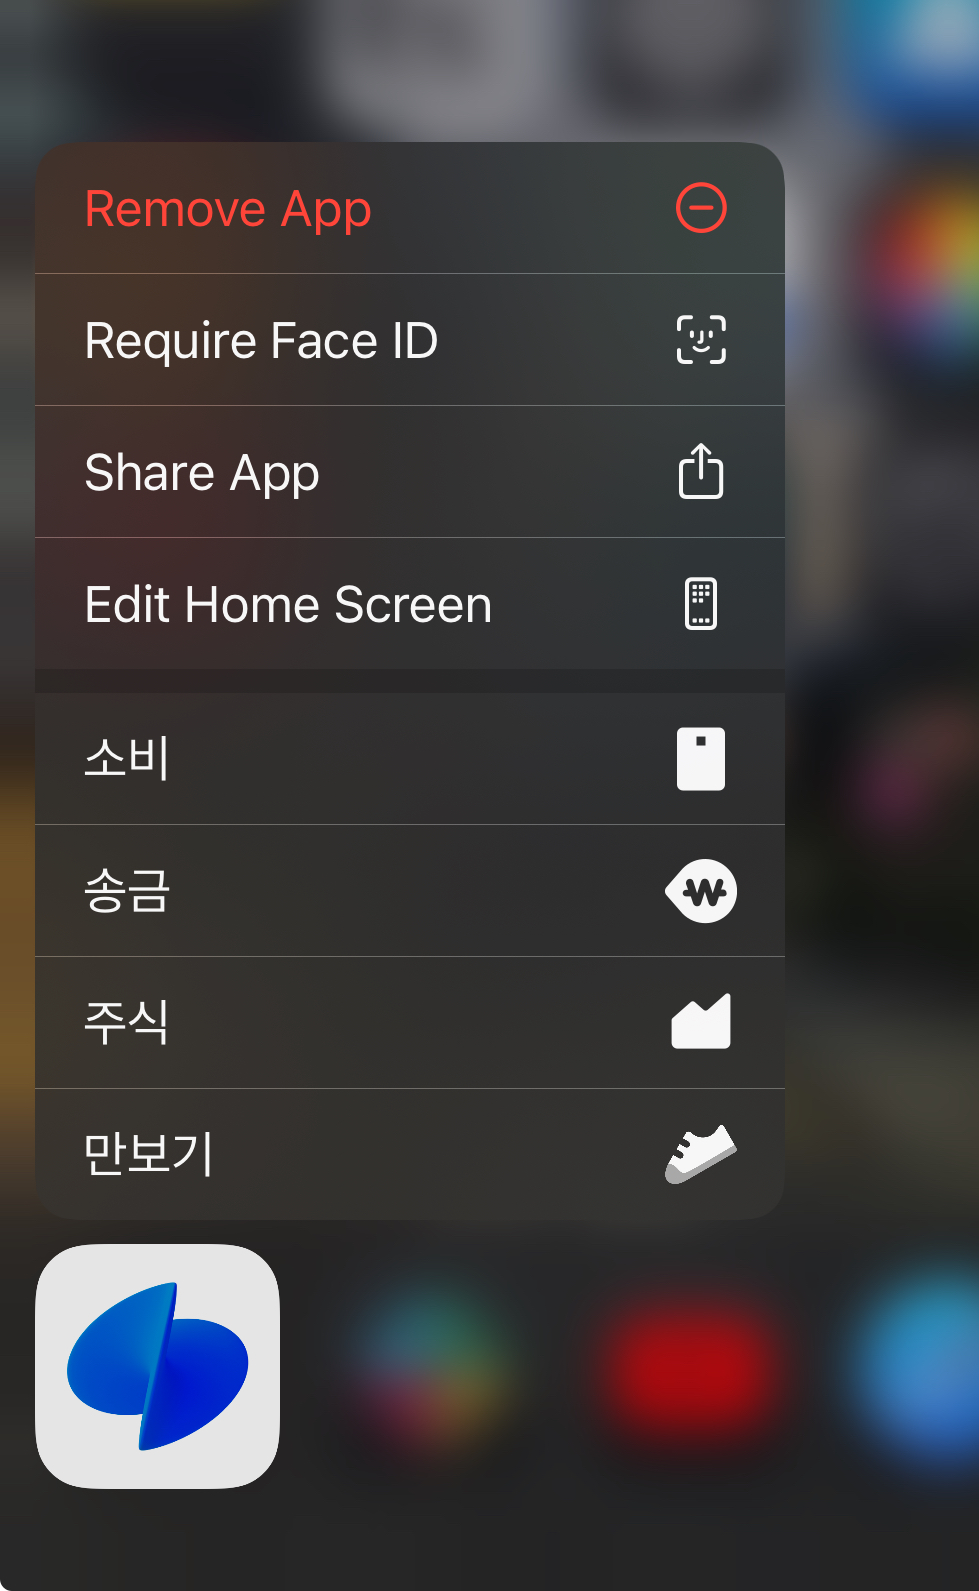
당연하지만 위의 Context Menu는 단축키 일 뿐이라 Context Menu의 존재를 전혀 몰라도 앱을 문제 없이 사용할 수 있습니다. 실제로 애플의 Human Interface Guideline에서도 Context Menu를 앱을 자주 사용하는 헤비 유저들이 편하게 사용하는 기능이 될 수는 있어도 똑같은 동작을 앱에서도 제공할 것을 권고하고 있습니다. 😅
Although a context menu provides convenient access to frequently used items, it’s hidden by default, so people might not know it’s there. (중략) Always make context menu items available in the main interface, too
큰 그림
- Home 화면의 Context Menu는 굉장히 오래된 기능입니다. SwiftUI는 있지도 않고 UIKit가 있을 때 나왔습니다.
- 반면 그렇게 중요한 기능은 아니죠. 여기서 눈치 빠른 분은 짐작하셨듯이, SwiftUI에서 바로 기능을 구현할 수 있는 방법은 없습니다... 🥹
- 그렇기 때문에 우선 UIKit으로 기능을 작성하고, 이를 SwiftUI에 연동해야 합니다.
- ContextMenu 자체를 보여주는건 Info.plist로 추가할 수 있습니다.
1 - Info.plist에 추가하기
info.plist는 일반적으로 아래와 같은 XCode가 보여주는 예쁜 UI로만 다루는 경우가 많습니다.
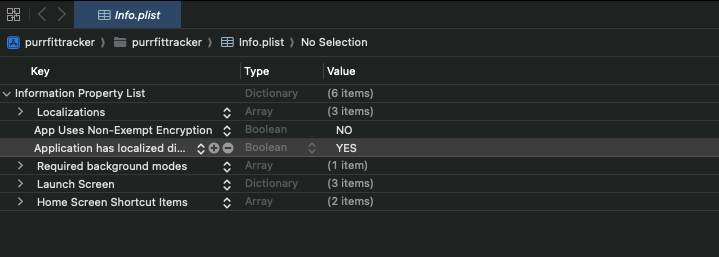
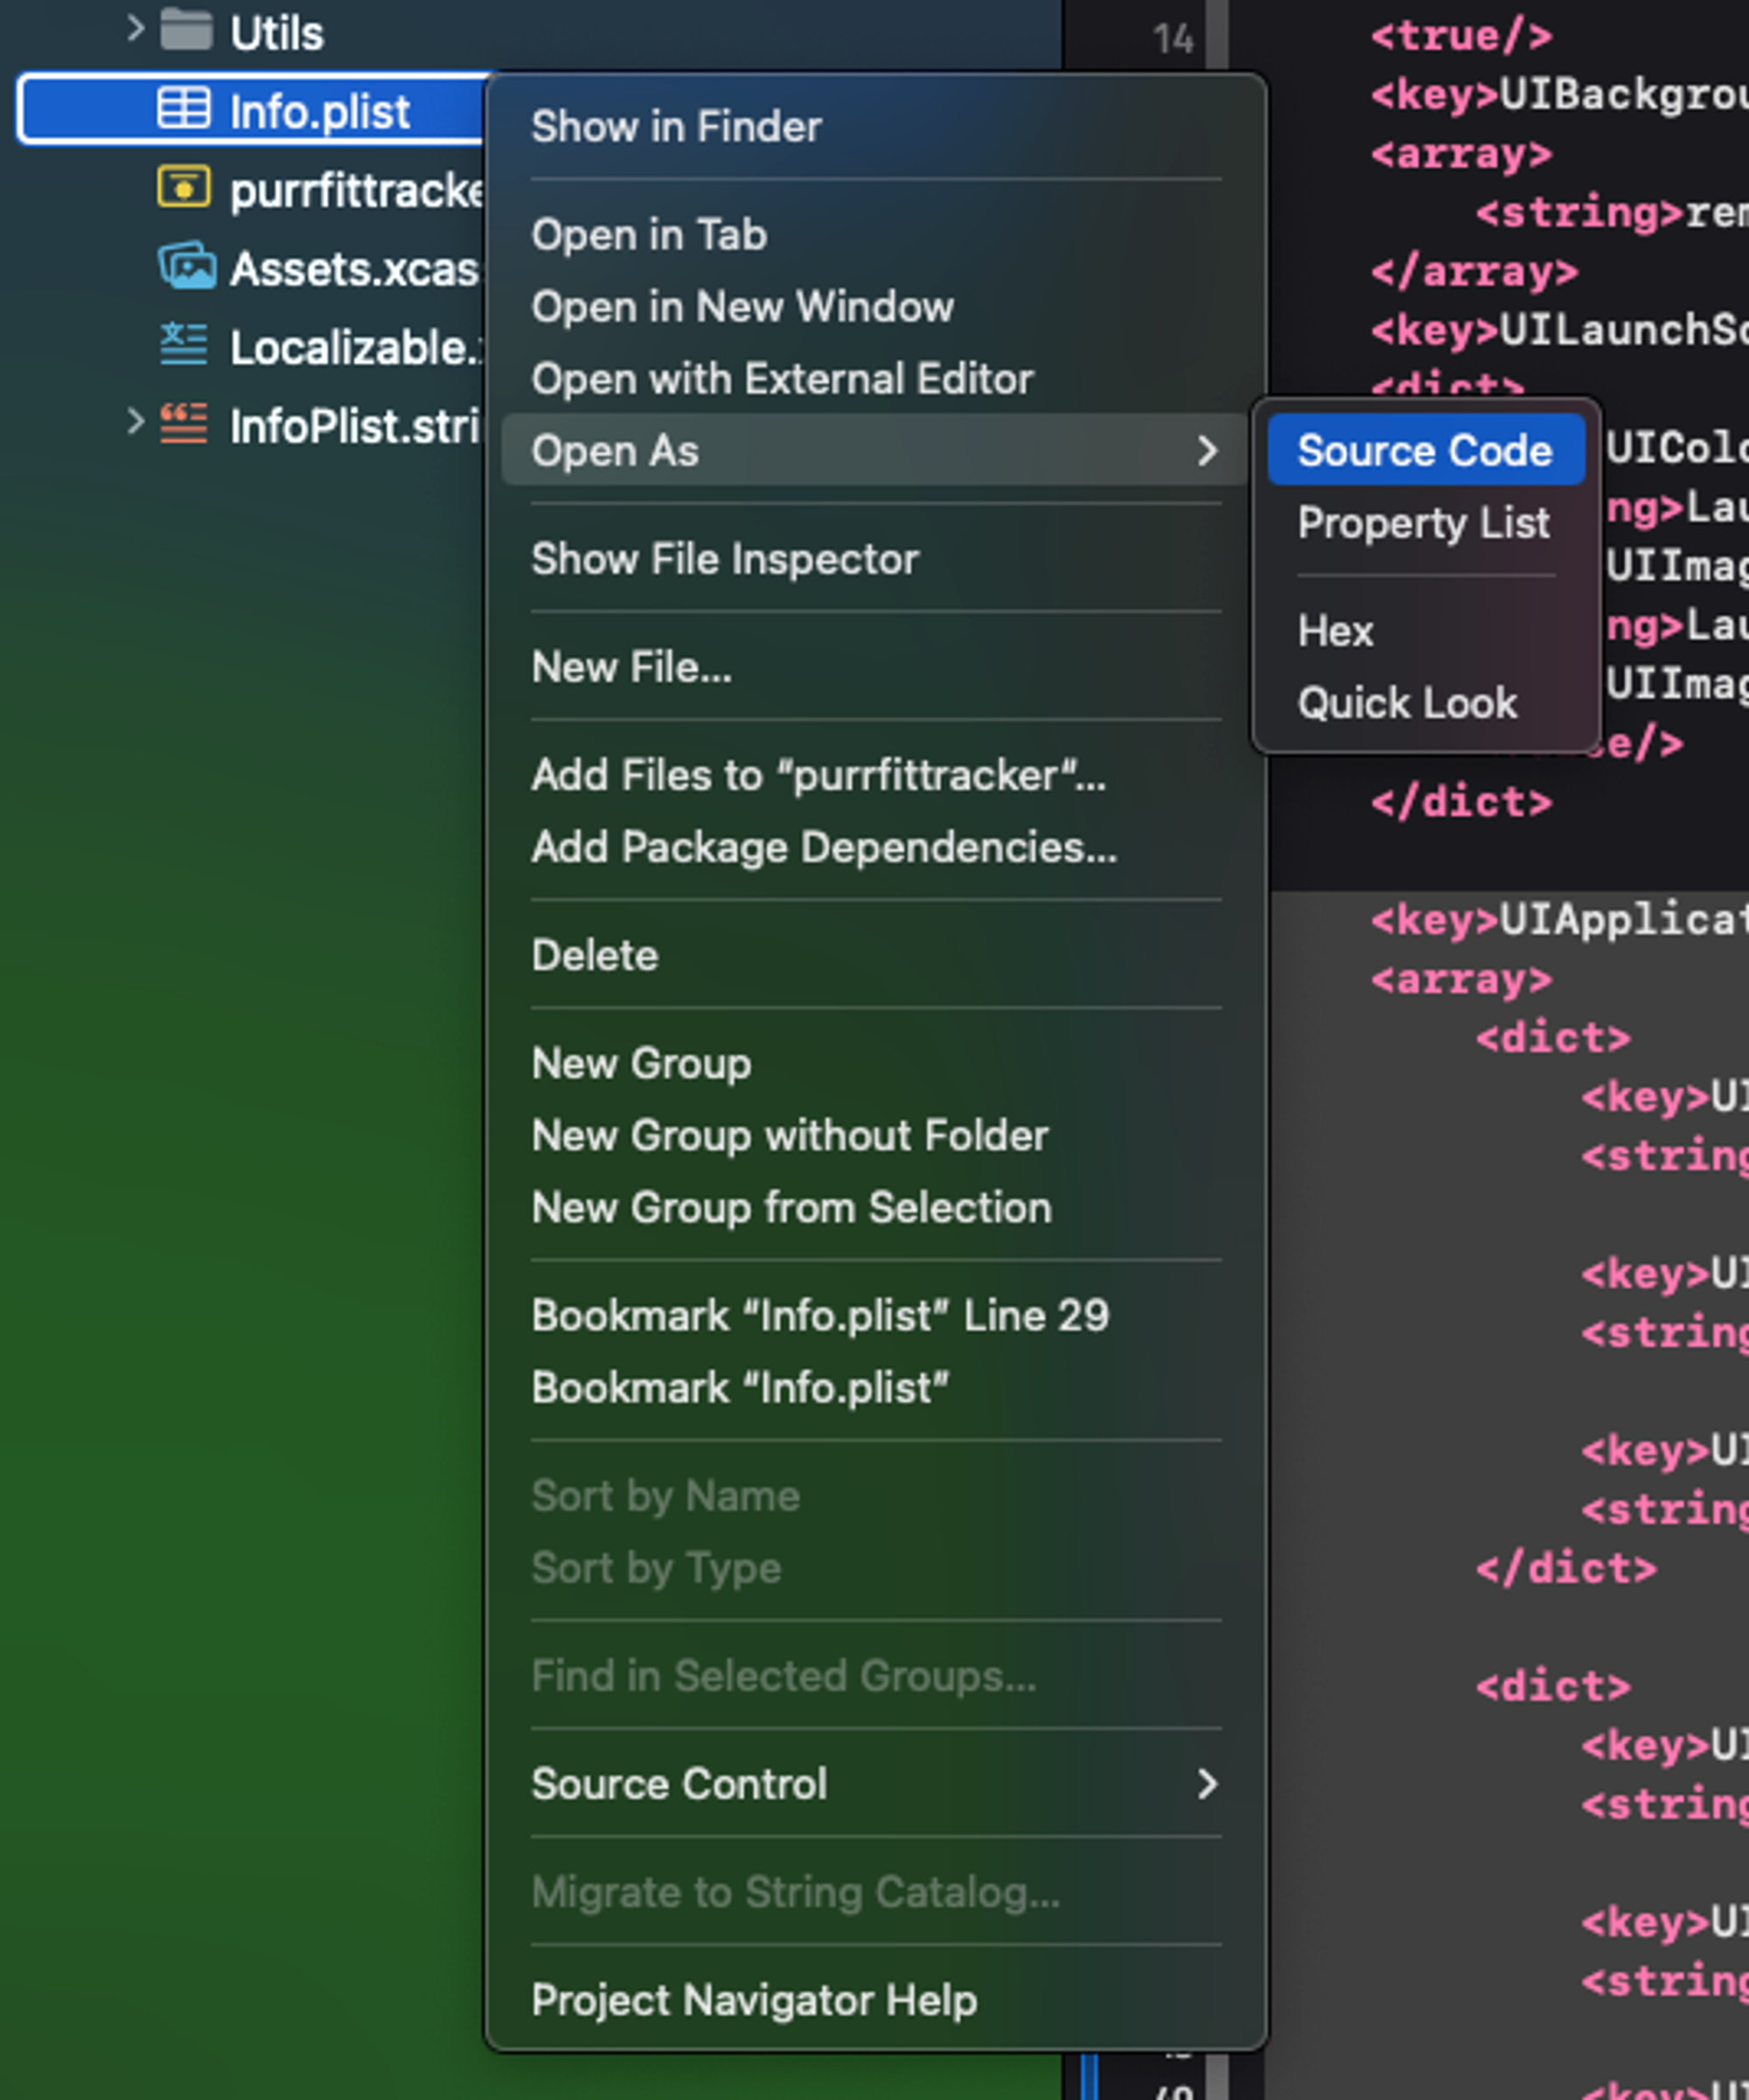
하지만 사실 info.plist는 xml 입니다. Home 화면에서의 ContextMenu를 추가하기 위해 더 편한 xml로 info.plist를 열어 주세요.
그리고 아래와 같은 코드를 추가해 주면 됩니다.
<key>UIApplicationShortcutItems</key>
<array>
    <dict>
        <key>UIApplicationShortcutItemType</key>
        <string>앱_내에서_쓸_이벤트_이름</string>

        <key>UIApplicationShortcutItemTitle</key>
        <string>UI_에서_보여_질_문구</string>

        <key>UIApplicationShortcutItemIconType</key>
        <string>버튼의_종류</string>
    </dict>
</array>- Key는 UIApplicationShortcutItems입니다. 말씀 드렸듯, 이 기능은 나온지가 꽤 돼서 UIKit 바탕으로 돼 있습니다.
- Value는 Array라 여러개가 올 수 있습니다. 각 원소가 UI에서 보일 버튼입니다.
- 크게 3가지 속성을 명시해 주면 되는데요. UIApplicationShortcutItemType, UIApplicationShortcutItemTitle, UIApplicationShortcutItemIconType 입니다.
- UIApplicationShortcutItemType은 앱 내에서 이 버튼을 누르면 발행 될 이벤트 이름입니다.
- UIApplicationShortcutItemTitle는 실제 UI에서 보일 문구입니다. 위의 토스 예제에서는 소비, 송금, 주식, 만보기가 이 값입니다.
- UIApplicationShortcutItemIconType은 이게 어떤 버튼인지를 나타내는 값 입니다. 추가, 수정, 검색, 재생, 정지 등등... 종류에 따라 아이콘도 달라지고, 여러 접근성 (Accessibility) 기능에도 영향을 줍니다.
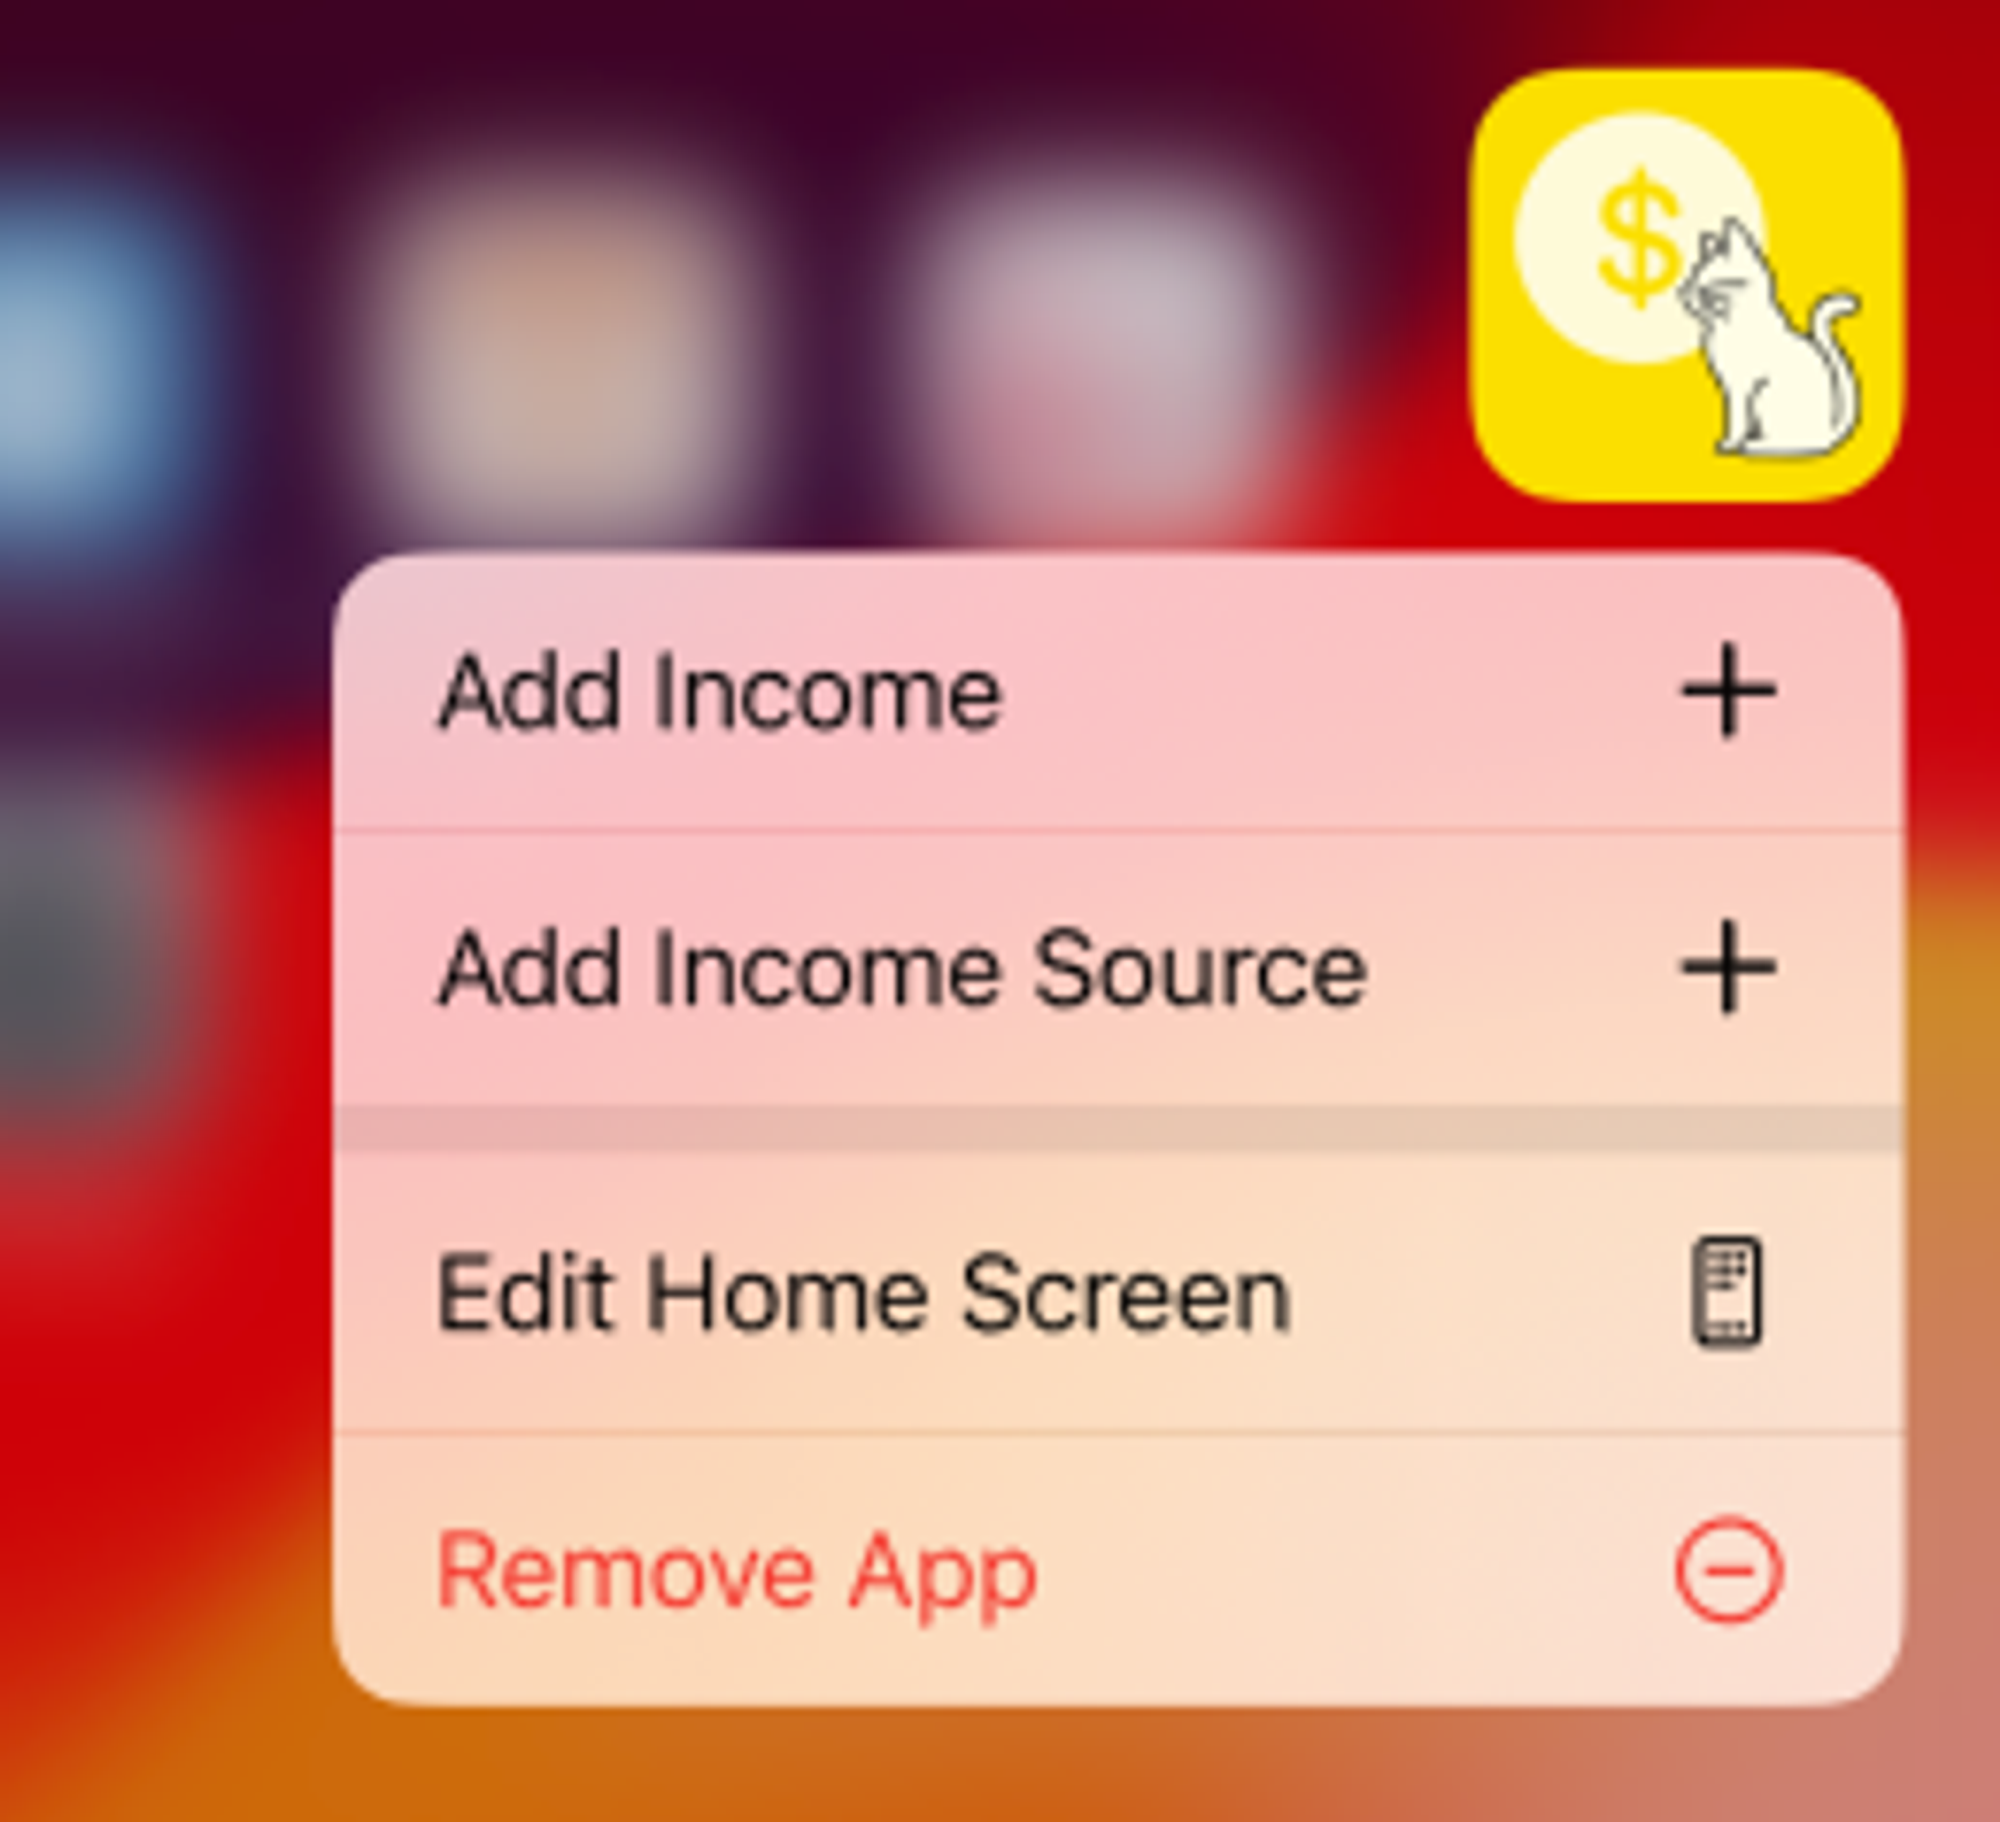
제 앱을 예로 들자면 아래 사진과 같은 ContextMenu를 보여주기 위해 아래와 같은 코드가 필요했습니다.
<key>UIApplicationShortcutItems</key>
<array>
    <dict>
        <key>UIApplicationShortcutItemType</key>
        <string>com.jinkyumpark.purrfittracker.add.income</string>

        <key>UIApplicationShortcutItemTitle</key>
        <string>Add Income</string>

        <key>UIApplicationShortcutItemIconType</key>
        <string>UIApplicationShortcutIconTypeAdd</string>
    </dict>

    <dict>
        <key>UIApplicationShortcutItemType</key>
        <string>com.jinkyumpark.purrfittracker.add.incomesource</string>

        <key>UIApplicationShortcutItemTitle</key>
        <string>Add Income Source</string>

        <key>UIApplicationShortcutItemIconType</key>
        <string>UIApplicationShortcutIconTypeAdd</string>
    </dict>
</array>
2 - UIKit 코드 작성하기
이제 UIKit 코드를 작성해야 합니다. UIKit에서 작성해야 될 내용은 전역적인 이벤트를 탐지해 적절한 동작을 해야 하니 슬프게도 AppDelegate와 SceneDelegate를 사용해야 합니다. 여기서 이벤트를 탐지해서 적절한 동작을 한 뒤, 이 클래스를 SwiftUI에 주입 해 주면 됩니다.
class AppDelegate: UIApplicationDelegate, NSObject {
    func application(
        _ application: UIApplication,
        configurationForConnecting connectingSceneSession: UISceneSession,
        options: UIScene.ConnectionOptions
    ) -> UISceneConfiguration {
        if let shortcutItem = options.shortcutItem {
            handleHomeQuickActions(shortcutItem.type)
        }

        let sceneConfiguration = UISceneConfiguration(name: "Custom Configuration", sessionRole: connectingSceneSession.role)
        sceneConfiguration.delegateClass = CustomSceneDelegate.self
        return sceneConfiguration
    }
}

class CustomSceneDelegate: UIResponder, UIWindowSceneDelegate {
    func windowScene(
        _ windowScene: UIWindowScene,
        performActionFor shortcutItem: UIApplicationShortcutItem,
        completionHandler: @escaping (Bool) -> Void
    ) {
        handleHomeQuickActions(shortcutItem.type)
    }
}- UIApplicationDelegate를 상속해서 AppDelegate를 구현해 줍니다.
- 여기서 application이라는 함수의 options라는 parameter에서 shortcutItem이라는 객체에 저희가 원하는 홈 화면에서 누른 이벤트 정보를 찾을 수 있습니다.
- shortcutItem의 type이라는 속성에 info.plist의 UIApplicationShortcutItemType에서 명시한 값이 들어 있습니다.
- 이게 있다면 적절한 함수를 호출합니다. 여기서 UIKit의 생명주기 객체들과 SwiftUI는 분리 돼 있기 때문에 이벤트 방식으로 처리해야 하는데 이는 4번에서 자세히 다루겠습니다.
3 - SwiftUI에 작성한 UIKit 코드 사용하기
이제 이벤트를 처리하는 AppDelegate와 SceneDelegate를 SwiftUI의 @main에서 @UIApplicationDelegateAdaptor를 사용해 주입 해 주면 됩니다. 크게 할 건 없고, SwiftUI의 @main이 붙어있는 struct에 아래 코드 1줄만 추가하면 됩니다.
@UIApplicationDelegateAdaptor(AppDelegate.self) var appDelegate4 - NotificationCenter 사용해서 이벤트 처리하기
위에서 말했듯, UIKit의 생명주기와 SwiftUI의 생명주기는 분리 돼 있기 때문에 이벤트를 발행해서 처리해야 합니다. 이를 위해 NotificationCenter를 사용하겠습니다.
이벤트를 발행하려면 post를 사용하면 됩니다.
NotificationCenter.default.post(name: Notification.Name("Example"), object: nil)
이벤트를 처리하려면 addObserver를 사용하면 됩니다.
NotificationCenter.default.addObserver(forName: Notification.Name("Example"), object: nil, queue: .main) { _ in
	// Business Logic
}
저 addObserver를 SwiftUI View의 onAppear에 넣어 두면 쉽게 이벤트를 처리할 수 있겠죠?
Localization 처리?
여기서 끝나면 좋겠지만 아쉽게도 제 앱은 전세계에 출시된 앱이였습니다... 달러 좀 벌어 보겠다고 객기를 부린 탓에 🥹그래서 국제화 처리를 해야 하는데요, 이게 1번 해 보면 간단한데 처음 해 보면 해멜 수 있어서 간단히 소개 해 두겠습니다.
- info.plist의 문구에 Localization Key를 ${}안에 넣는다.
- String Catalog에 국제화를 한다
이 보다 간단할 수는 없죠? 근데 주의 사항이 있습니다!
- Localization Key는 띄어쓰기 없이 _로만 구분 돼야 한다
- String Catalog는 info.plist용을 따로 만들어야 한다
참고
Add Home Screen Quick Actions | Apple Developer Documentation
Expose commonly used functionality with static or dynamic 3D Touch Home Screen quick actions.
developer.apple.com
Context menus | Apple Developer Documentation
A context menu provides access to functionality that’s directly related to an item, without cluttering the interface.
developer.apple.com
'👨💻 프로그래밍 > 🍎 iOS 개발' 카테고리의 다른 글
| 🍎 Swift Package에서 Localization 처리하기 (0) | 2024.08.10 |
|---|---|
| 🍎 나만의 Swift Package 만들기! - 개인 프로젝트에서 중복되는 코드 없애기 (0) | 2024.08.08 |
| 🍎 iOS에서 서버를 거치지 않고 알림 보내기 (UserNotifications) (0) | 2024.08.02 |
| 🍎 XCTest로 Swift에서 Unit Test 하기 (0) | 2024.07.28 |
| 🍎 SwiftUI에서 숫자 입력하면 실시간으로 구분자(,) 붙이기 (0) | 2024.07.21 |


